Call Us -
Cart
0
A transfer board can turn a difficult move between a bed, wheelchair, chair, or vehicle into a controlled seated transfer. Knowing how to use transfer boards correctly helps reduce strain on the caregiver while helping the person transferring maintain as much independence as possible. The right technique matters: a board is not a substitute for proper balance, trunk control, or individualized clinical guidance.
Transfer boards, sometimes called sliding boards, are commonly used by people who cannot safely stand for a pivot transfer but can sit upright and move some weight through their arms. Before using one at home, ask a physical therapist, occupational therapist, nurse, or other qualified clinician to demonstrate the method that fits the individual's strength, diagnosis, and home setup.
What a Transfer Board Does
A transfer board creates a firm bridge between two surfaces. Instead of standing, the user moves across the board in small seated shifts. This may be helpful for wheelchair-to-bed, wheelchair-to-toilet or commode, wheelchair-to-car, and bed-to-chair transfers.
The board must be long enough to overlap both surfaces securely. One end sits beneath the user's thigh or buttock, while the other rests on the destination surface. The transfer should always move from a slightly higher surface to a slightly lower one when possible. Even a small height difference can make the movement easier and more controlled.
Not every person is a candidate for a transfer board. It may be unsafe for someone with severe weakness, poor sitting balance, confusion, significant pain, an open wound in the transfer area, or a condition that prevents weight-bearing through the arms. A clinician can help determine whether a board, transfer belt, mechanical lift, or another mobility aid is the safer choice.
How to Use Transfer Boards Step by Step
Preparation is where most safe transfers begin. Do not rush because the next surface is close. A board can slide, a wheelchair can move, or clothing can catch if the area is not set up first.
1. Prepare both transfer surfaces
Place the wheelchair or chair as close as possible to the destination surface, typically at a slight angle. For a bed transfer, position the wheelchair beside the bed rather than straight in front of it. Remove or swing away the wheelchair footrests and armrest on the transfer side if the chair design allows it.
Lock the wheelchair brakes every time. Check that the bed, chair, commode, or other surface is stable and will not roll or shift. Clear footrests, rugs, cords, pets, and other obstacles from the transfer path. If transferring to or from a vehicle, park on level ground whenever possible and make sure the vehicle seat is stable.
2. Set the height and position
Whenever you can, adjust the destination surface to be at the same height or slightly lower than the starting surface. A hospital bed can often be raised or lowered to support a safer transfer. Avoid a large uphill move across the board, which requires more strength and increases the risk of slipping.
Have the person sit close to the edge of the starting surface with both feet supported. Scooting forward may require small movements rather than one large push. The person should wear secure footwear or nonskid socks if their feet will touch the floor during setup.
3. Place the board securely
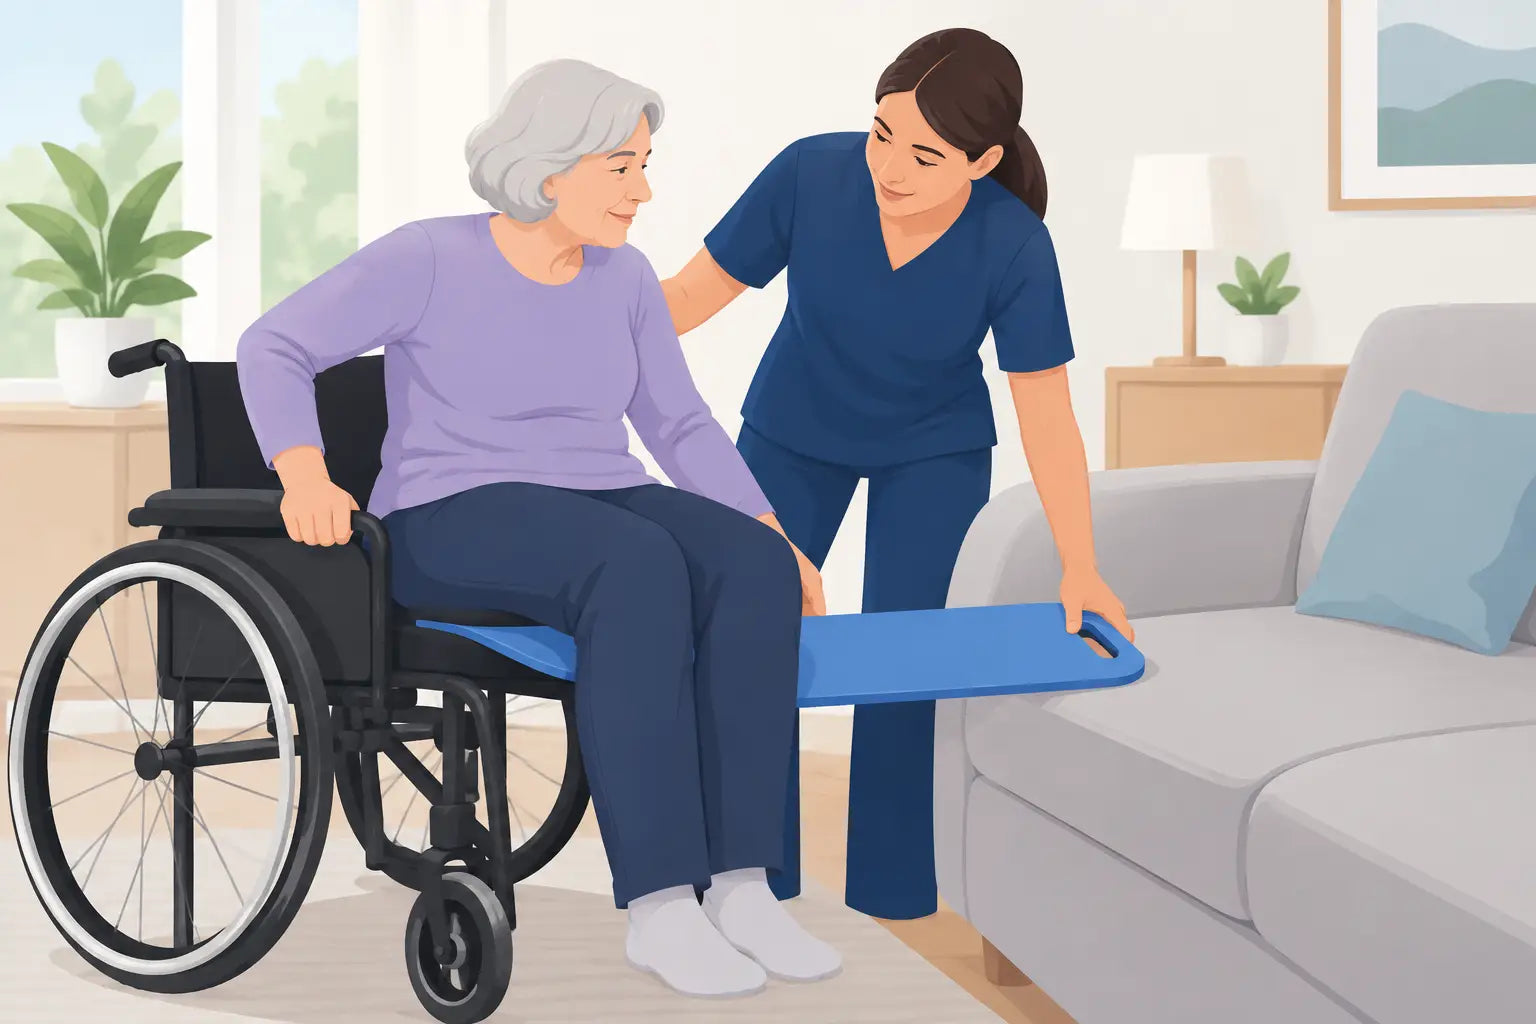
Place one end of the transfer board under one buttock or upper thigh. The other end should rest flat and securely on the destination surface with enough overlap to stay in place. Do not place the board on an unstable cushion, loose bedding, a wet surface, or the edge of a seat where it could slip.
The board should be positioned across the front of the body at a slight angle, not directly behind the user. Keep skin and clothing clear as much as possible. A transfer board can create friction, so careful placement is especially important for people with fragile skin or a history of pressure injuries.
4. Move across in small shifts
The person transferring should lean slightly forward and away from the direction of travel, then use their arms and hands to make a small sideways shift along the board. After each shift, pause, reset hand placement, and move again. The movement should be gradual rather than a single slide.
If a caregiver is assisting, they should avoid lifting the person's full body weight. Instead, remain close, use a transfer belt only if it has been recommended and taught by a clinician, and guide the transfer for balance and safety. Keep your back straight, bend at the knees, and avoid twisting. If the person begins to fall, do not try to catch their full weight. Follow the fall plan provided by their care team or call for help if needed.
5. Finish the transfer and remove the board
Once the person is fully on the destination surface, help them scoot back into a stable position before removing the board. Confirm that both feet are supported, clothing is comfortable, and the person is not sitting on an edge. Remove the board slowly and check the skin for redness, pinching, or discomfort.
When transferring into a wheelchair, replace the armrest and footrests if they were moved. Make sure the person is seated fully back in the chair before unlocking the brakes or moving the wheelchair.
Common Transfer Board Mistakes to Avoid
A transfer board works best when the setup is deliberate. Skipping a brake check is one of the most common and most dangerous errors. A wheelchair that rolls even a few inches can leave a gap between surfaces or cause a fall.
Another mistake is placing the board only on the edge of the destination surface. The board needs enough contact area to remain stable throughout the transfer. It should also be dry and free of lotion, powder, or moisture that could reduce grip.
Caregivers may also be tempted to pull under the person's arms. This can injure the shoulder, especially for someone with limited upper-body strength. Support should come from trained positioning techniques and appropriate equipment, not from lifting under the armpits.
Finally, do not use a board to force a transfer when the person is fatigued, dizzy, in pain, or unable to follow directions. Waiting, adjusting the setup, or choosing another method is safer than pushing through an unstable transfer.
Choosing the Right Transfer Board
Transfer boards come in several lengths, widths, materials, and shapes. A shorter board may work well in tight spaces, while a longer board may be more useful when there is a larger gap between surfaces. Straight boards are common for routine bed or wheelchair transfers. Curved boards can provide a wider path for some angles, particularly around wheelchair wheels.
Wood boards are often smooth and firm, but they need regular inspection for cracks, splinters, or rough edges. Plastic composite boards may be easier to clean and may include handholds, though handholds are not appropriate for every transfer technique. A board with a smooth surface can make movement easier, but it can also increase the risk of sliding too quickly if the user lacks control.
Weight capacity is a key safety detail. Choose a board rated for the user's body weight and consider the transfer environment, frequency of use, and whether a caregiver will need additional support equipment. Healthcare professionals should follow their facility's safe patient handling policies when selecting transfer aids for clinical use.
Cleaning and Storing Your Board
Wipe the board after use with a mild cleaner appropriate for its material, then dry it completely. Do not store it where it may be exposed to moisture, extreme heat, or heavy objects that can cause warping. Before each use, inspect the surface and edges for damage, cracks, sharp spots, or residue.
For households managing ongoing mobility needs, keeping the board in the same accessible location can prevent rushed searching during a transfer. Store it near the bed, wheelchair area, or entry point, but out of a walkway where it could become a tripping hazard.
A transfer board is a practical home mobility tool, but its value comes from using it with the right setup and support. If transfers feel unsafe or increasingly difficult, contact the care team before trying again. The right equipment and a hands-on demonstration can make daily movement safer, more comfortable, and more manageable.